I recently sold my Pro Display XDR and moved to a pair of Studio Displays.
The Studio Display is pretty great, especially with the optional height-adjustable stand. I didn’t use any of the high-end features of the XDR, and after just a few weeks, I’ve fallen in love with this setup, minus some cables that still need tidying:
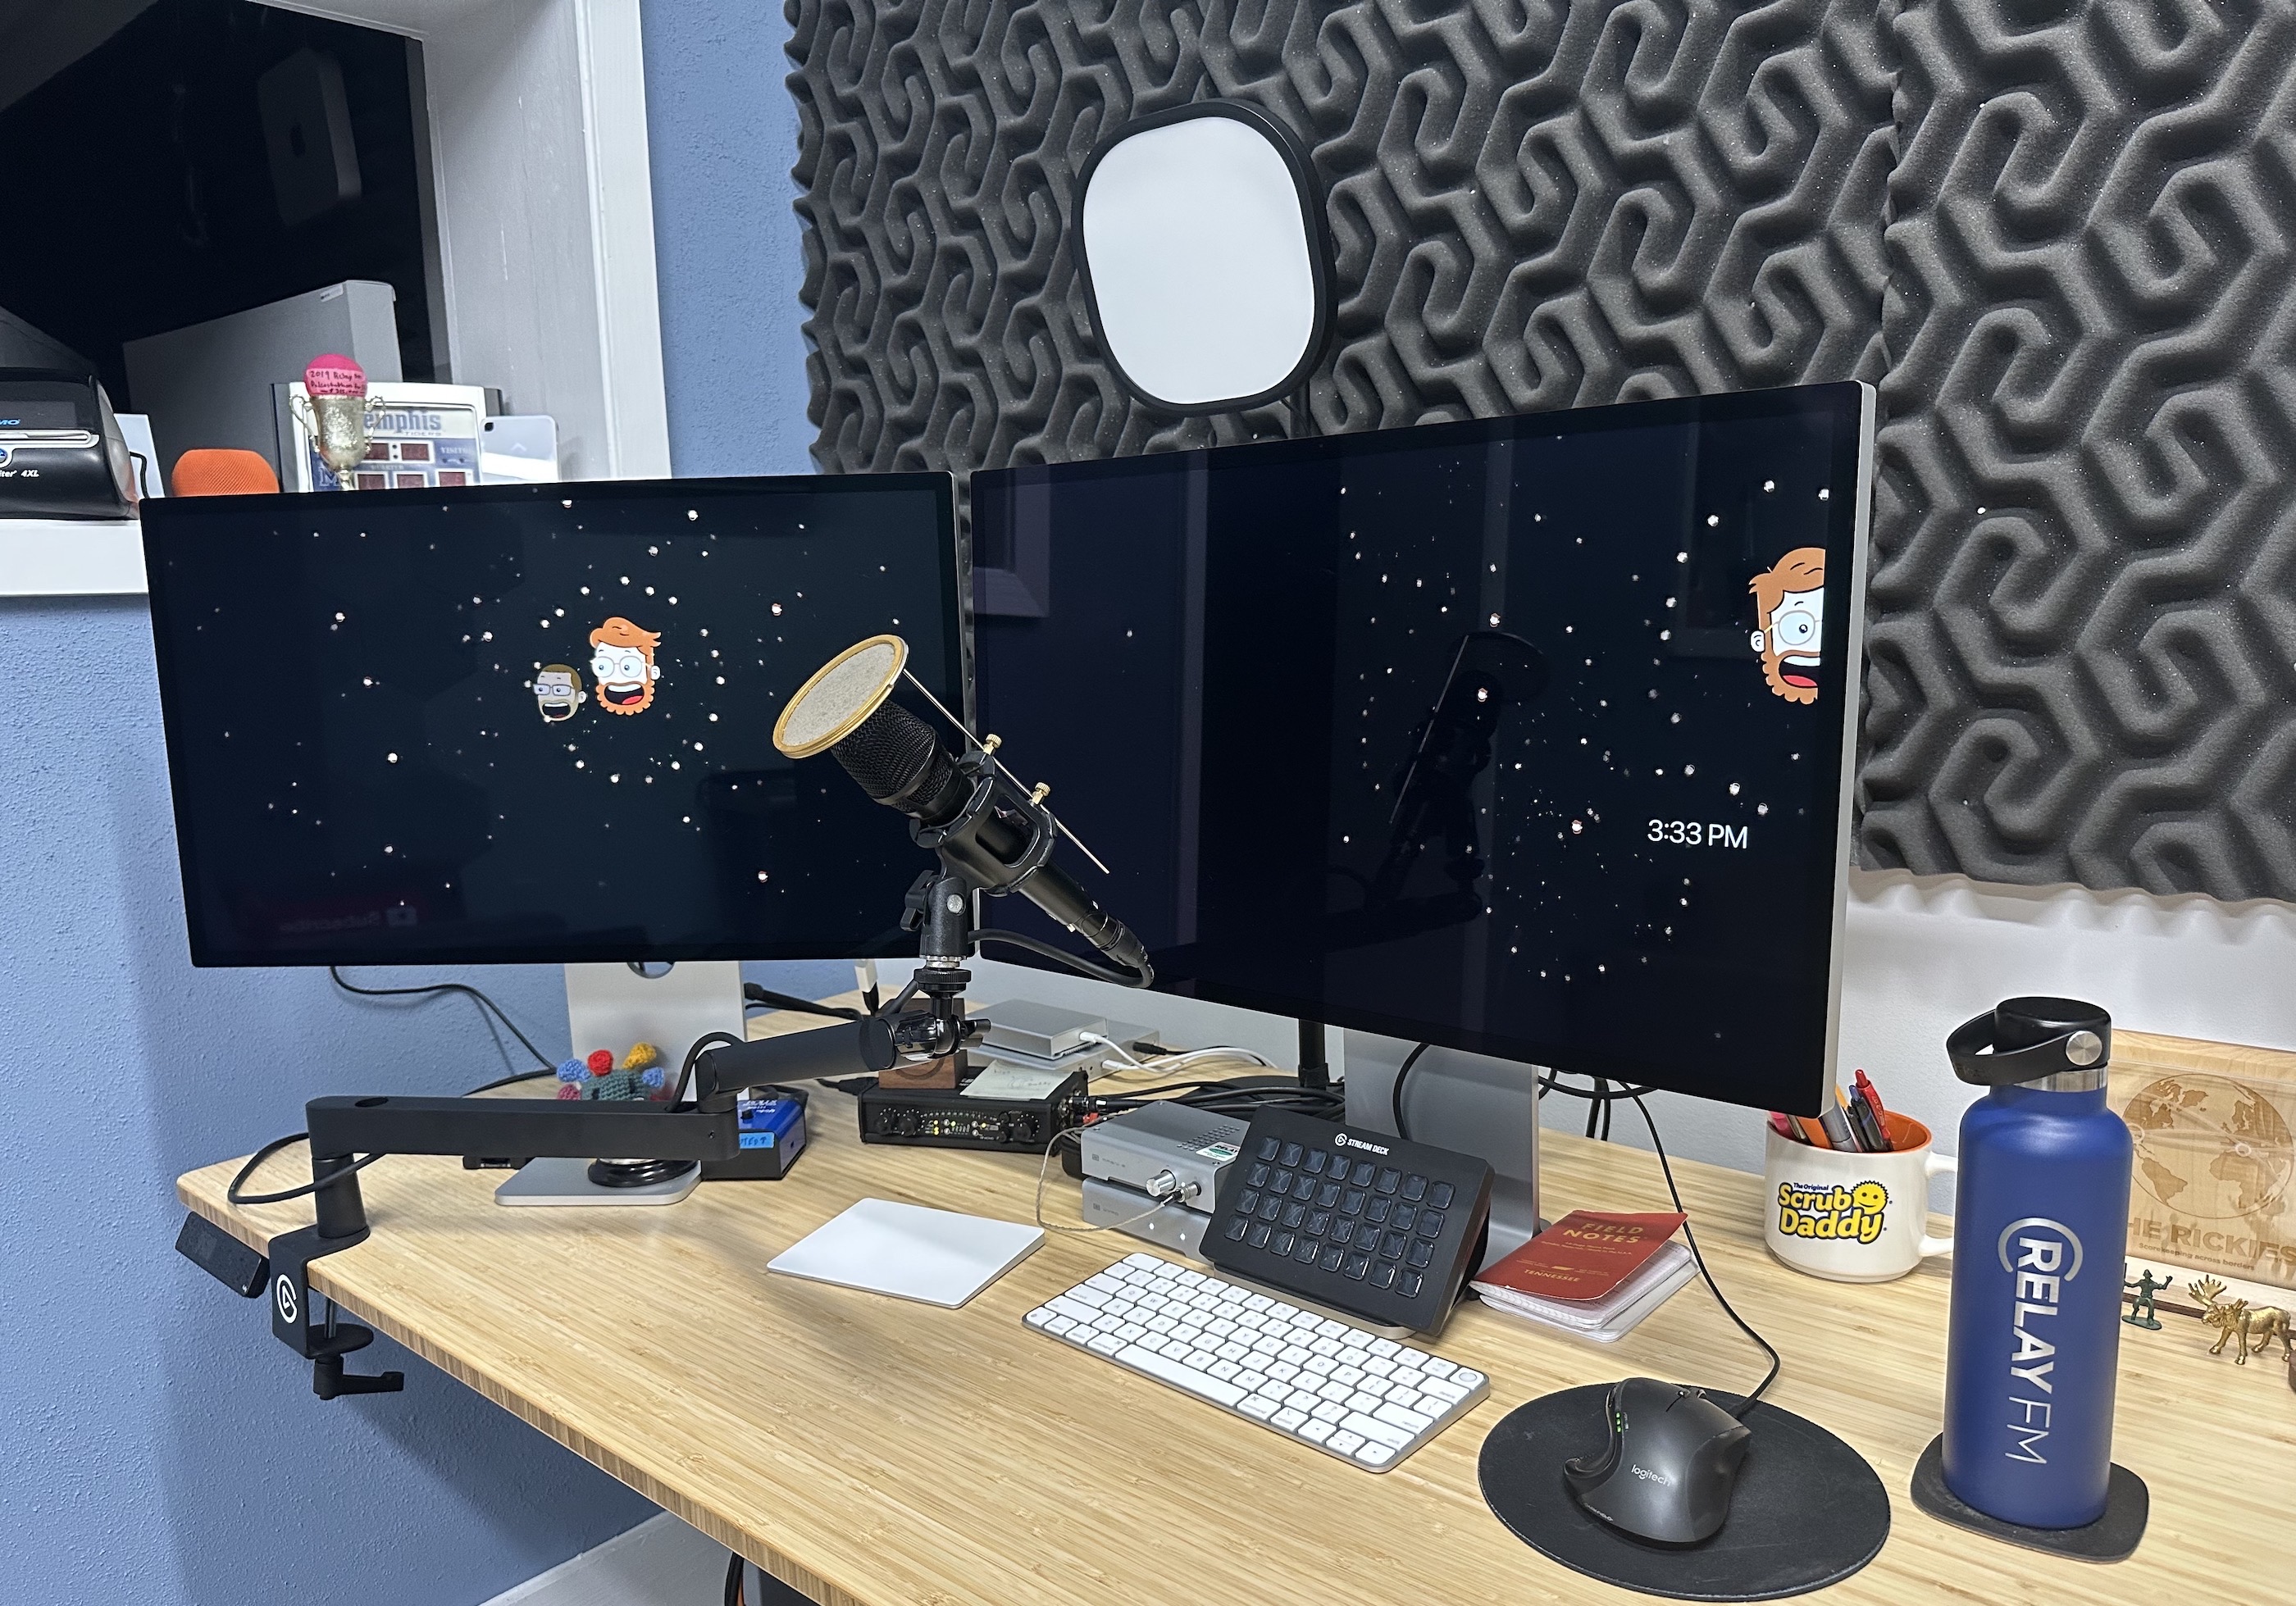
As the Studio Display comes with a better-than-expected set of internal speakers, this has marked the retirement of the pair of SoundSticks that I’ve been using as my speakers basically forever. As one of them had hot glue holding it together, it felt like it was time.
You know what’s better than one set of Studio Display speakers, though? Having two sets play at the same time. Yesterday, I was wondering how to do this, and then it hit me:
The full extent of what this application can do is far beyond the scope of this blog post, but in just a few minutes, I had all system audio passing through Loopback to both Studio Displays:
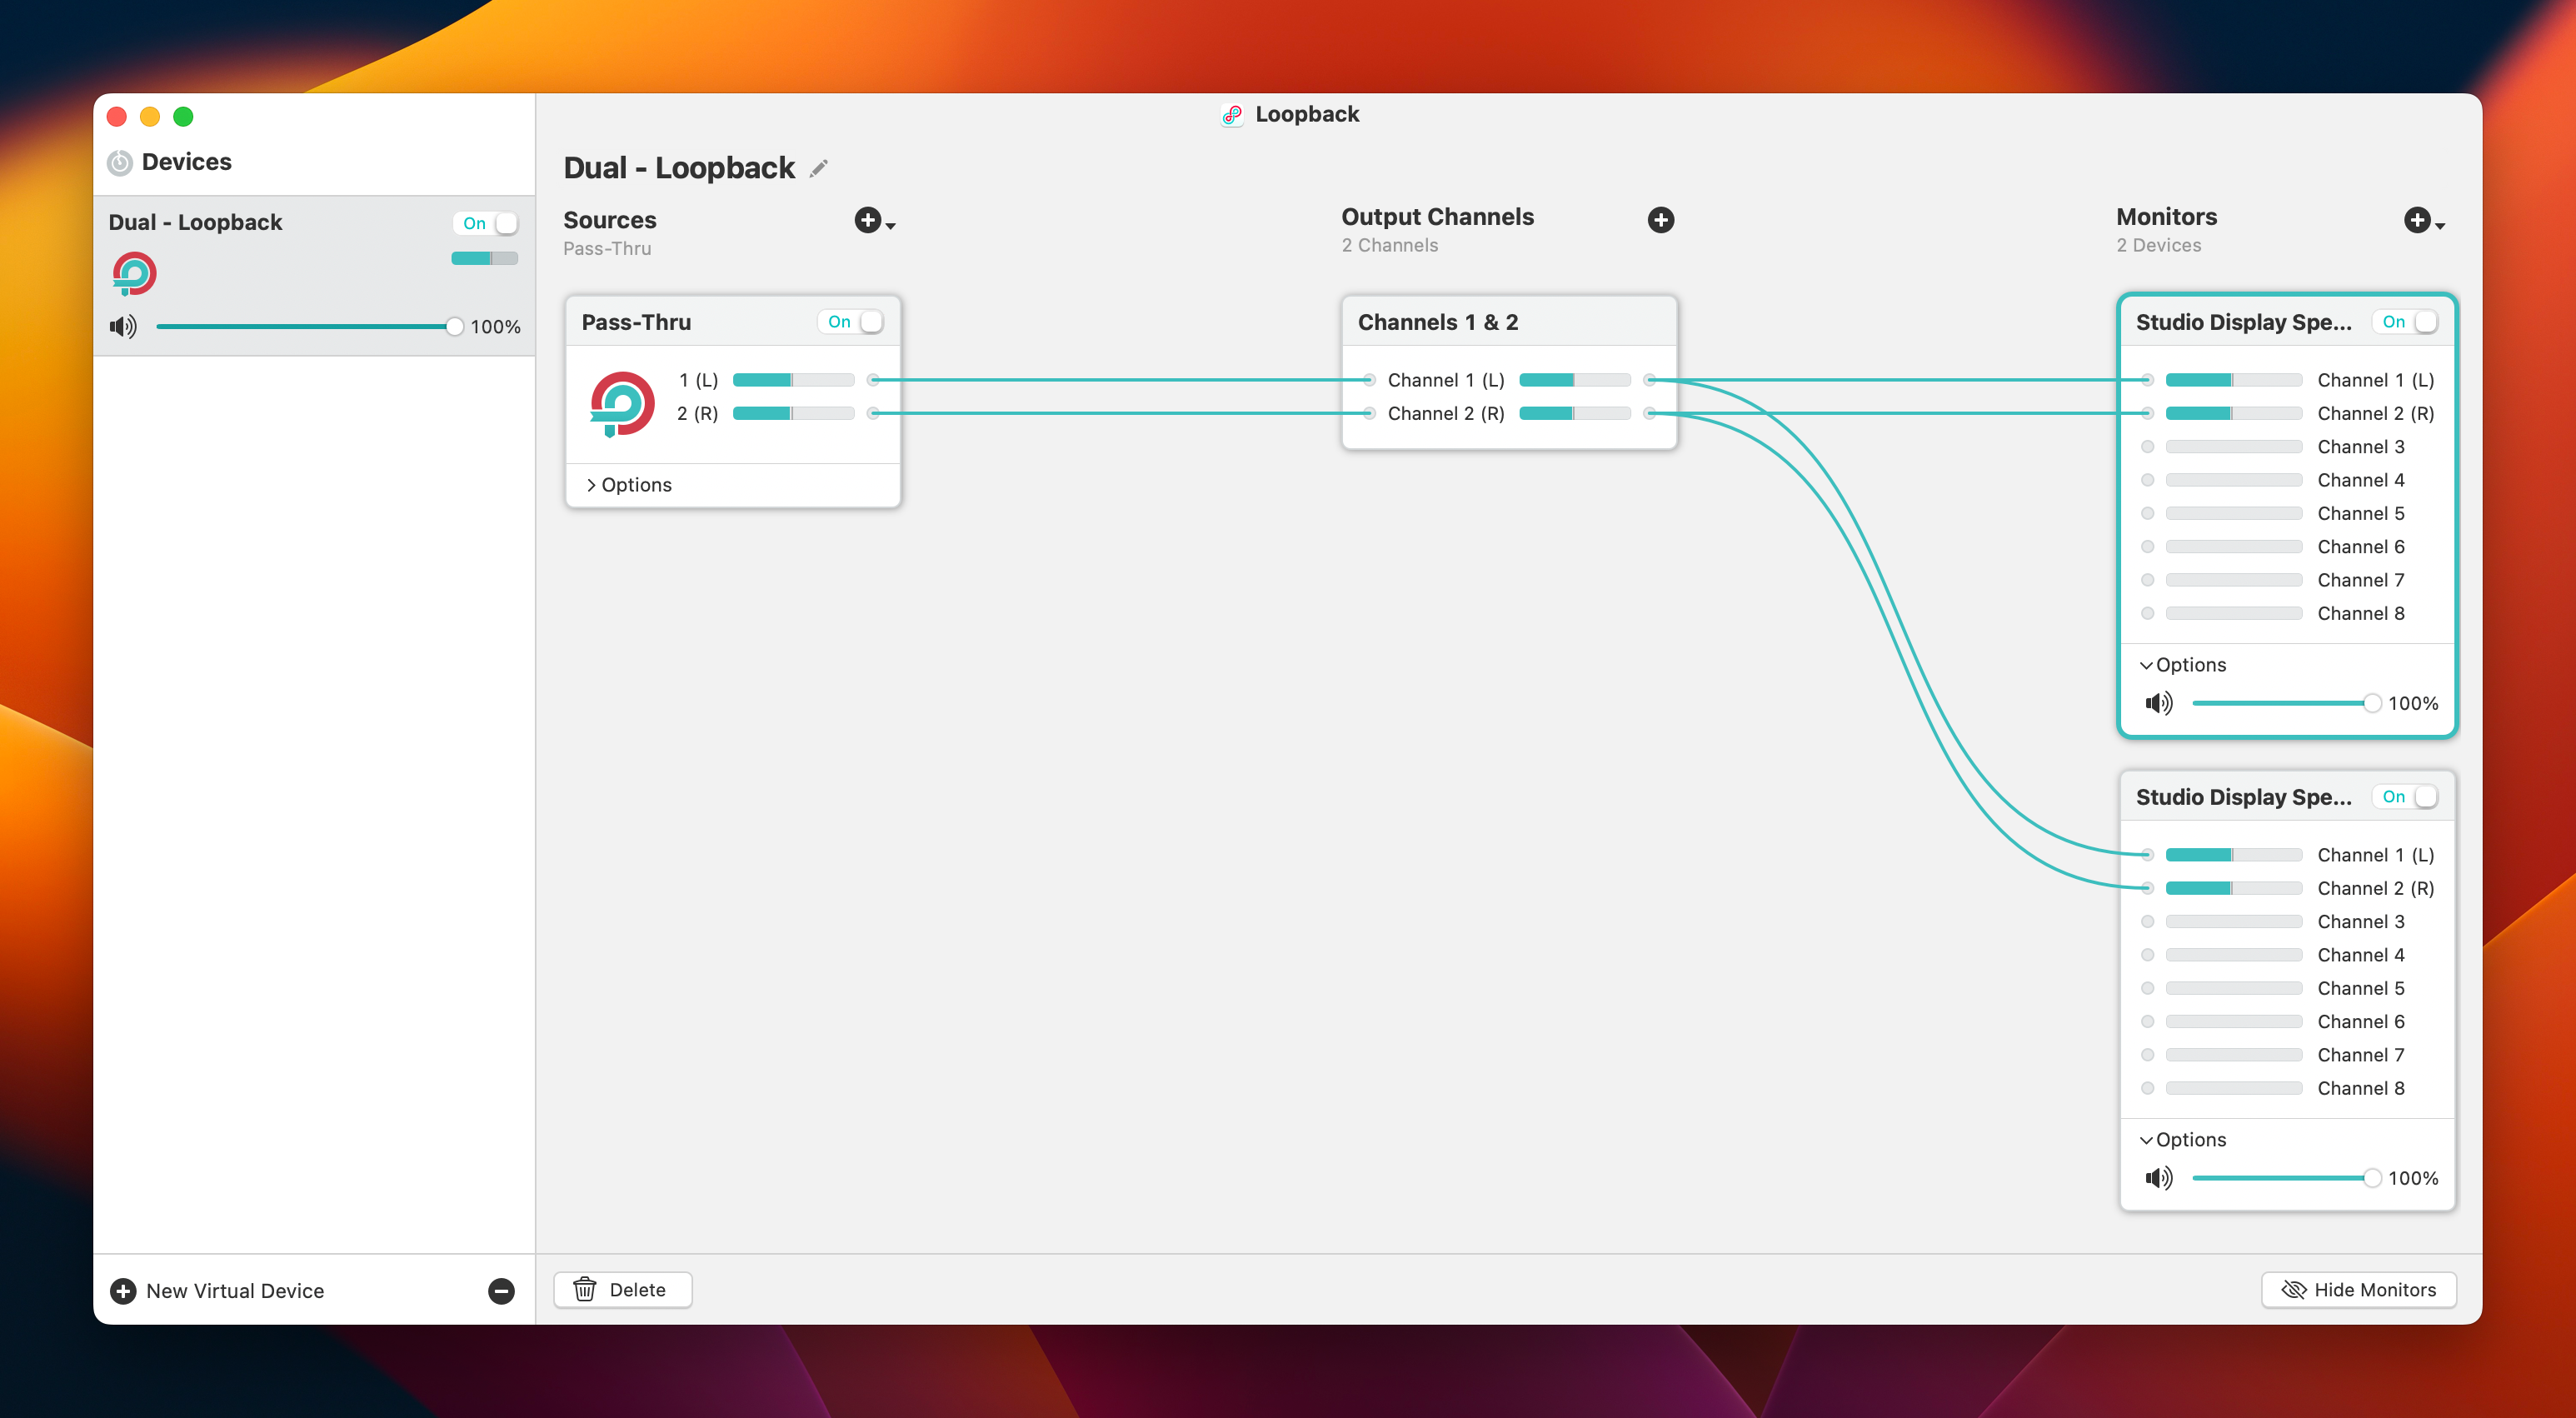
In this setup, the same audio is piped to both displays, so audio on the left channel plays through the left speaker on both displays. This means that the two speakers are playing the exact same thing.
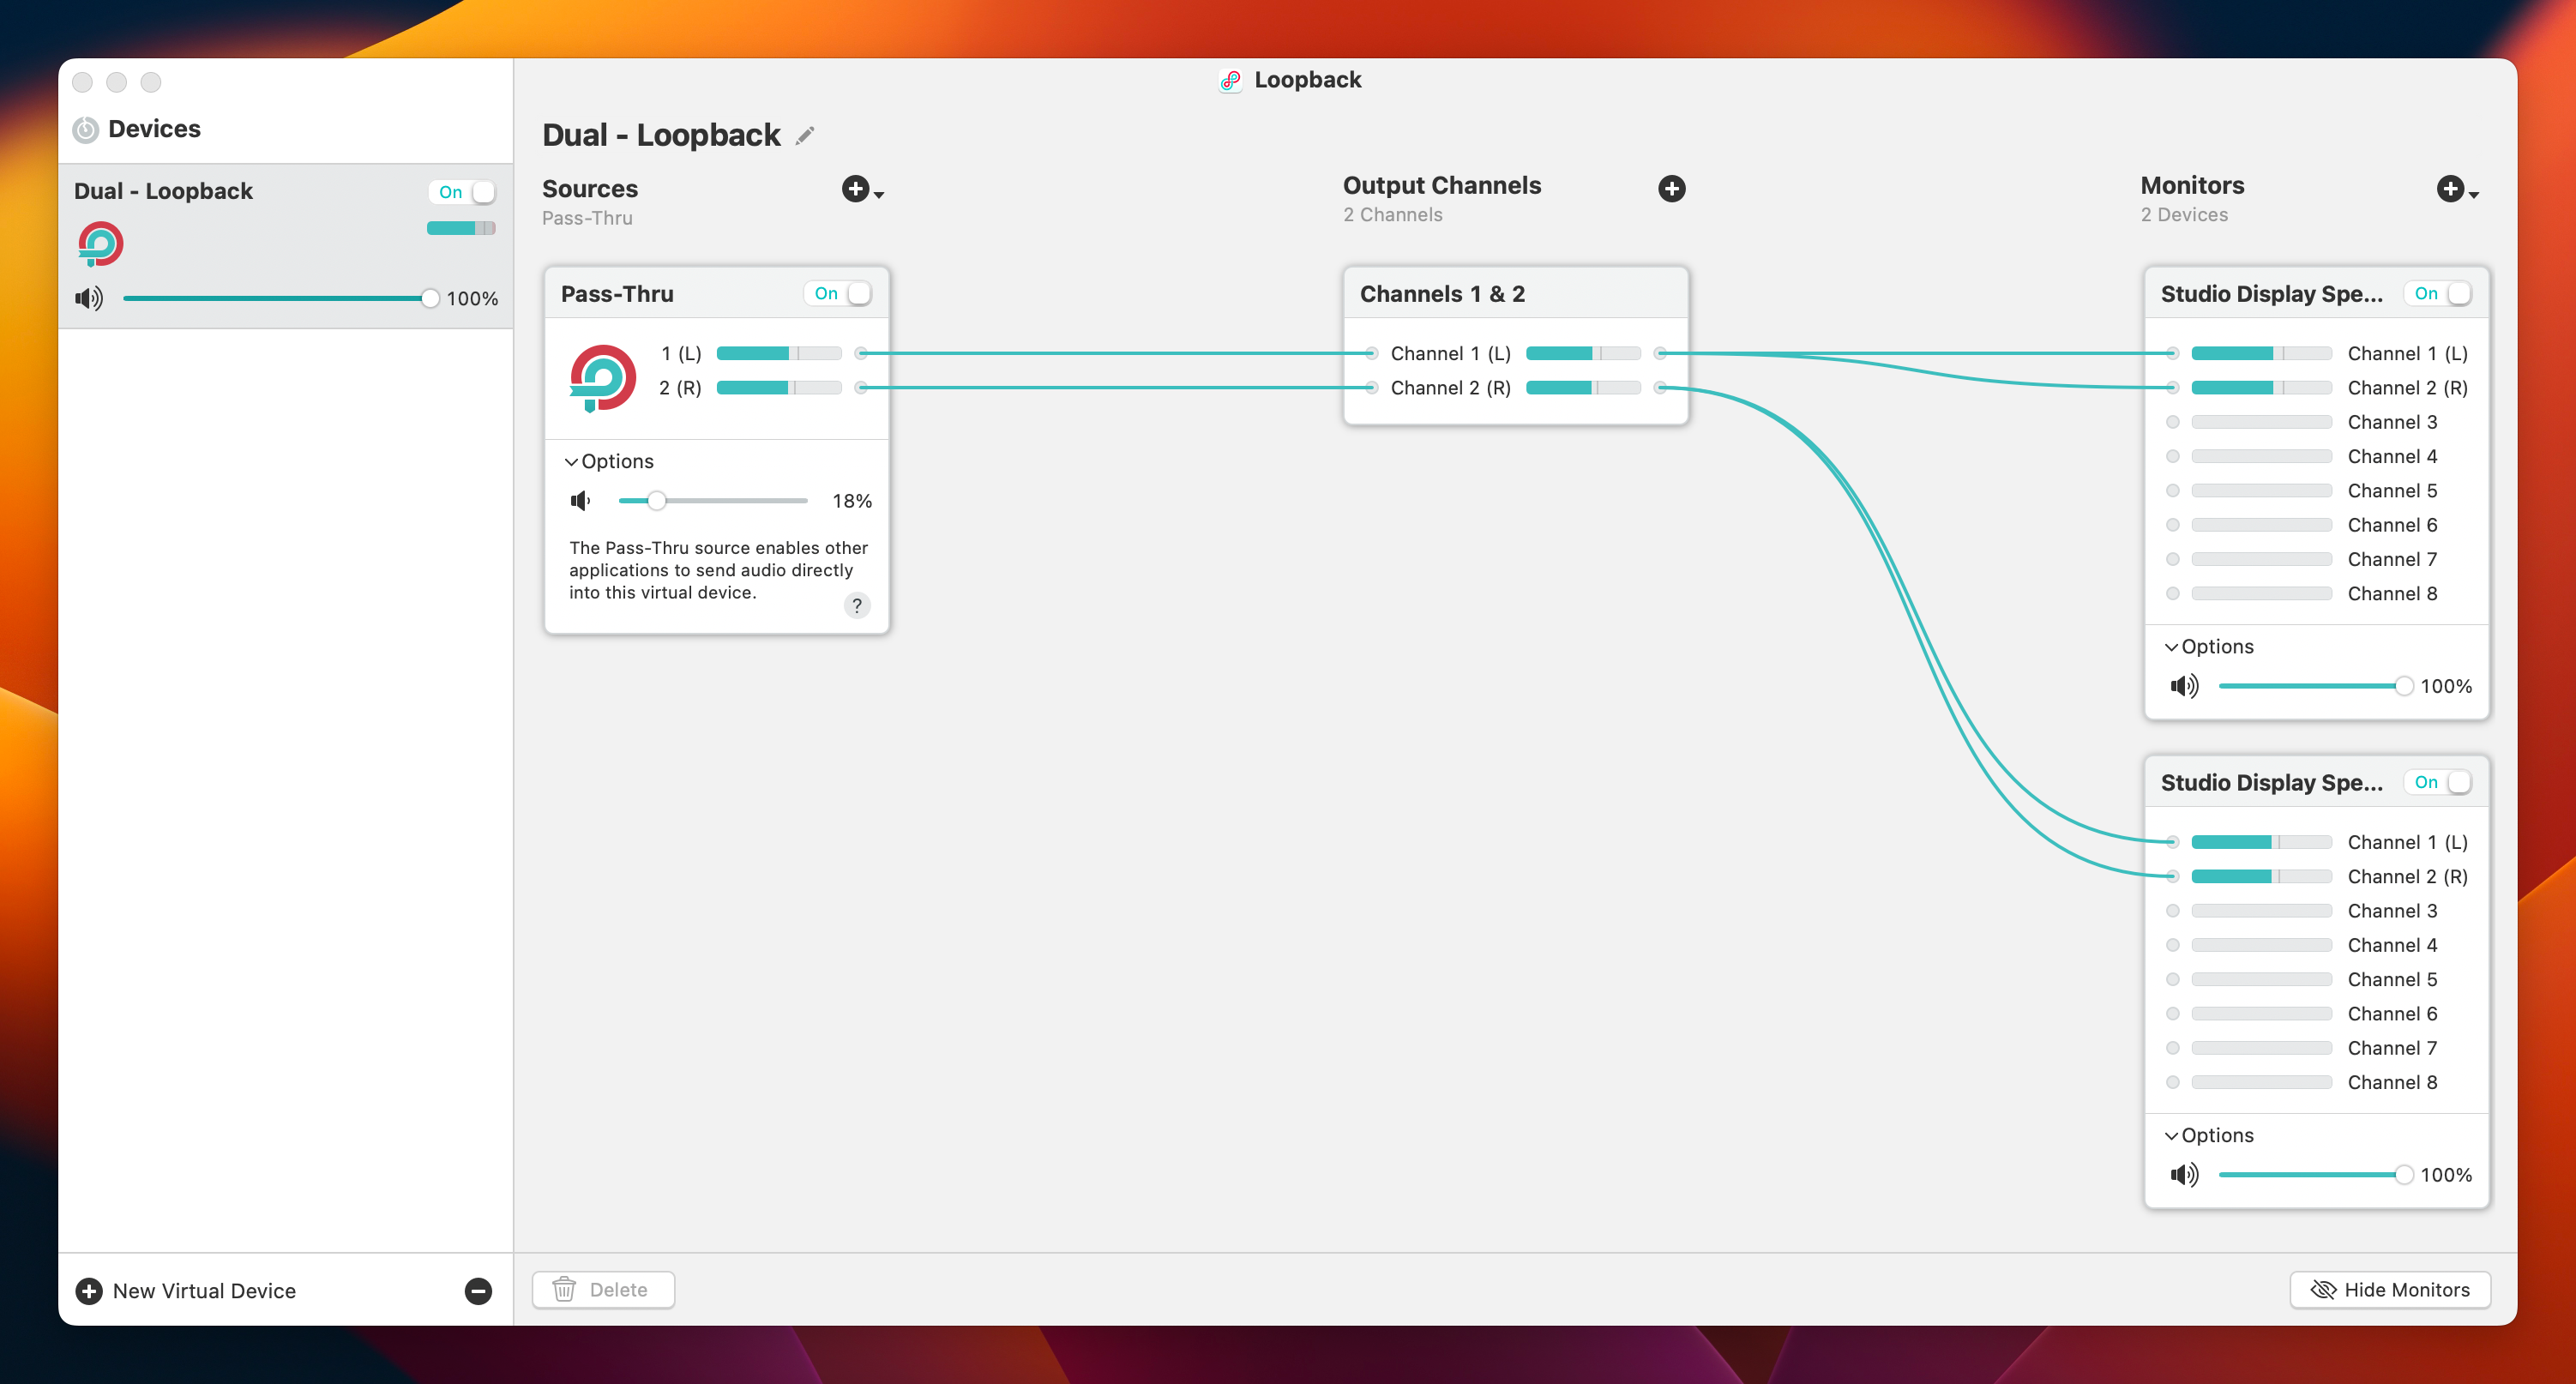
As I sit in front of one display, with the other to my left, this works best for me. However, if I wanted the left display to play just the left channel, and the right one to play just the right, then Loopback would look like this:
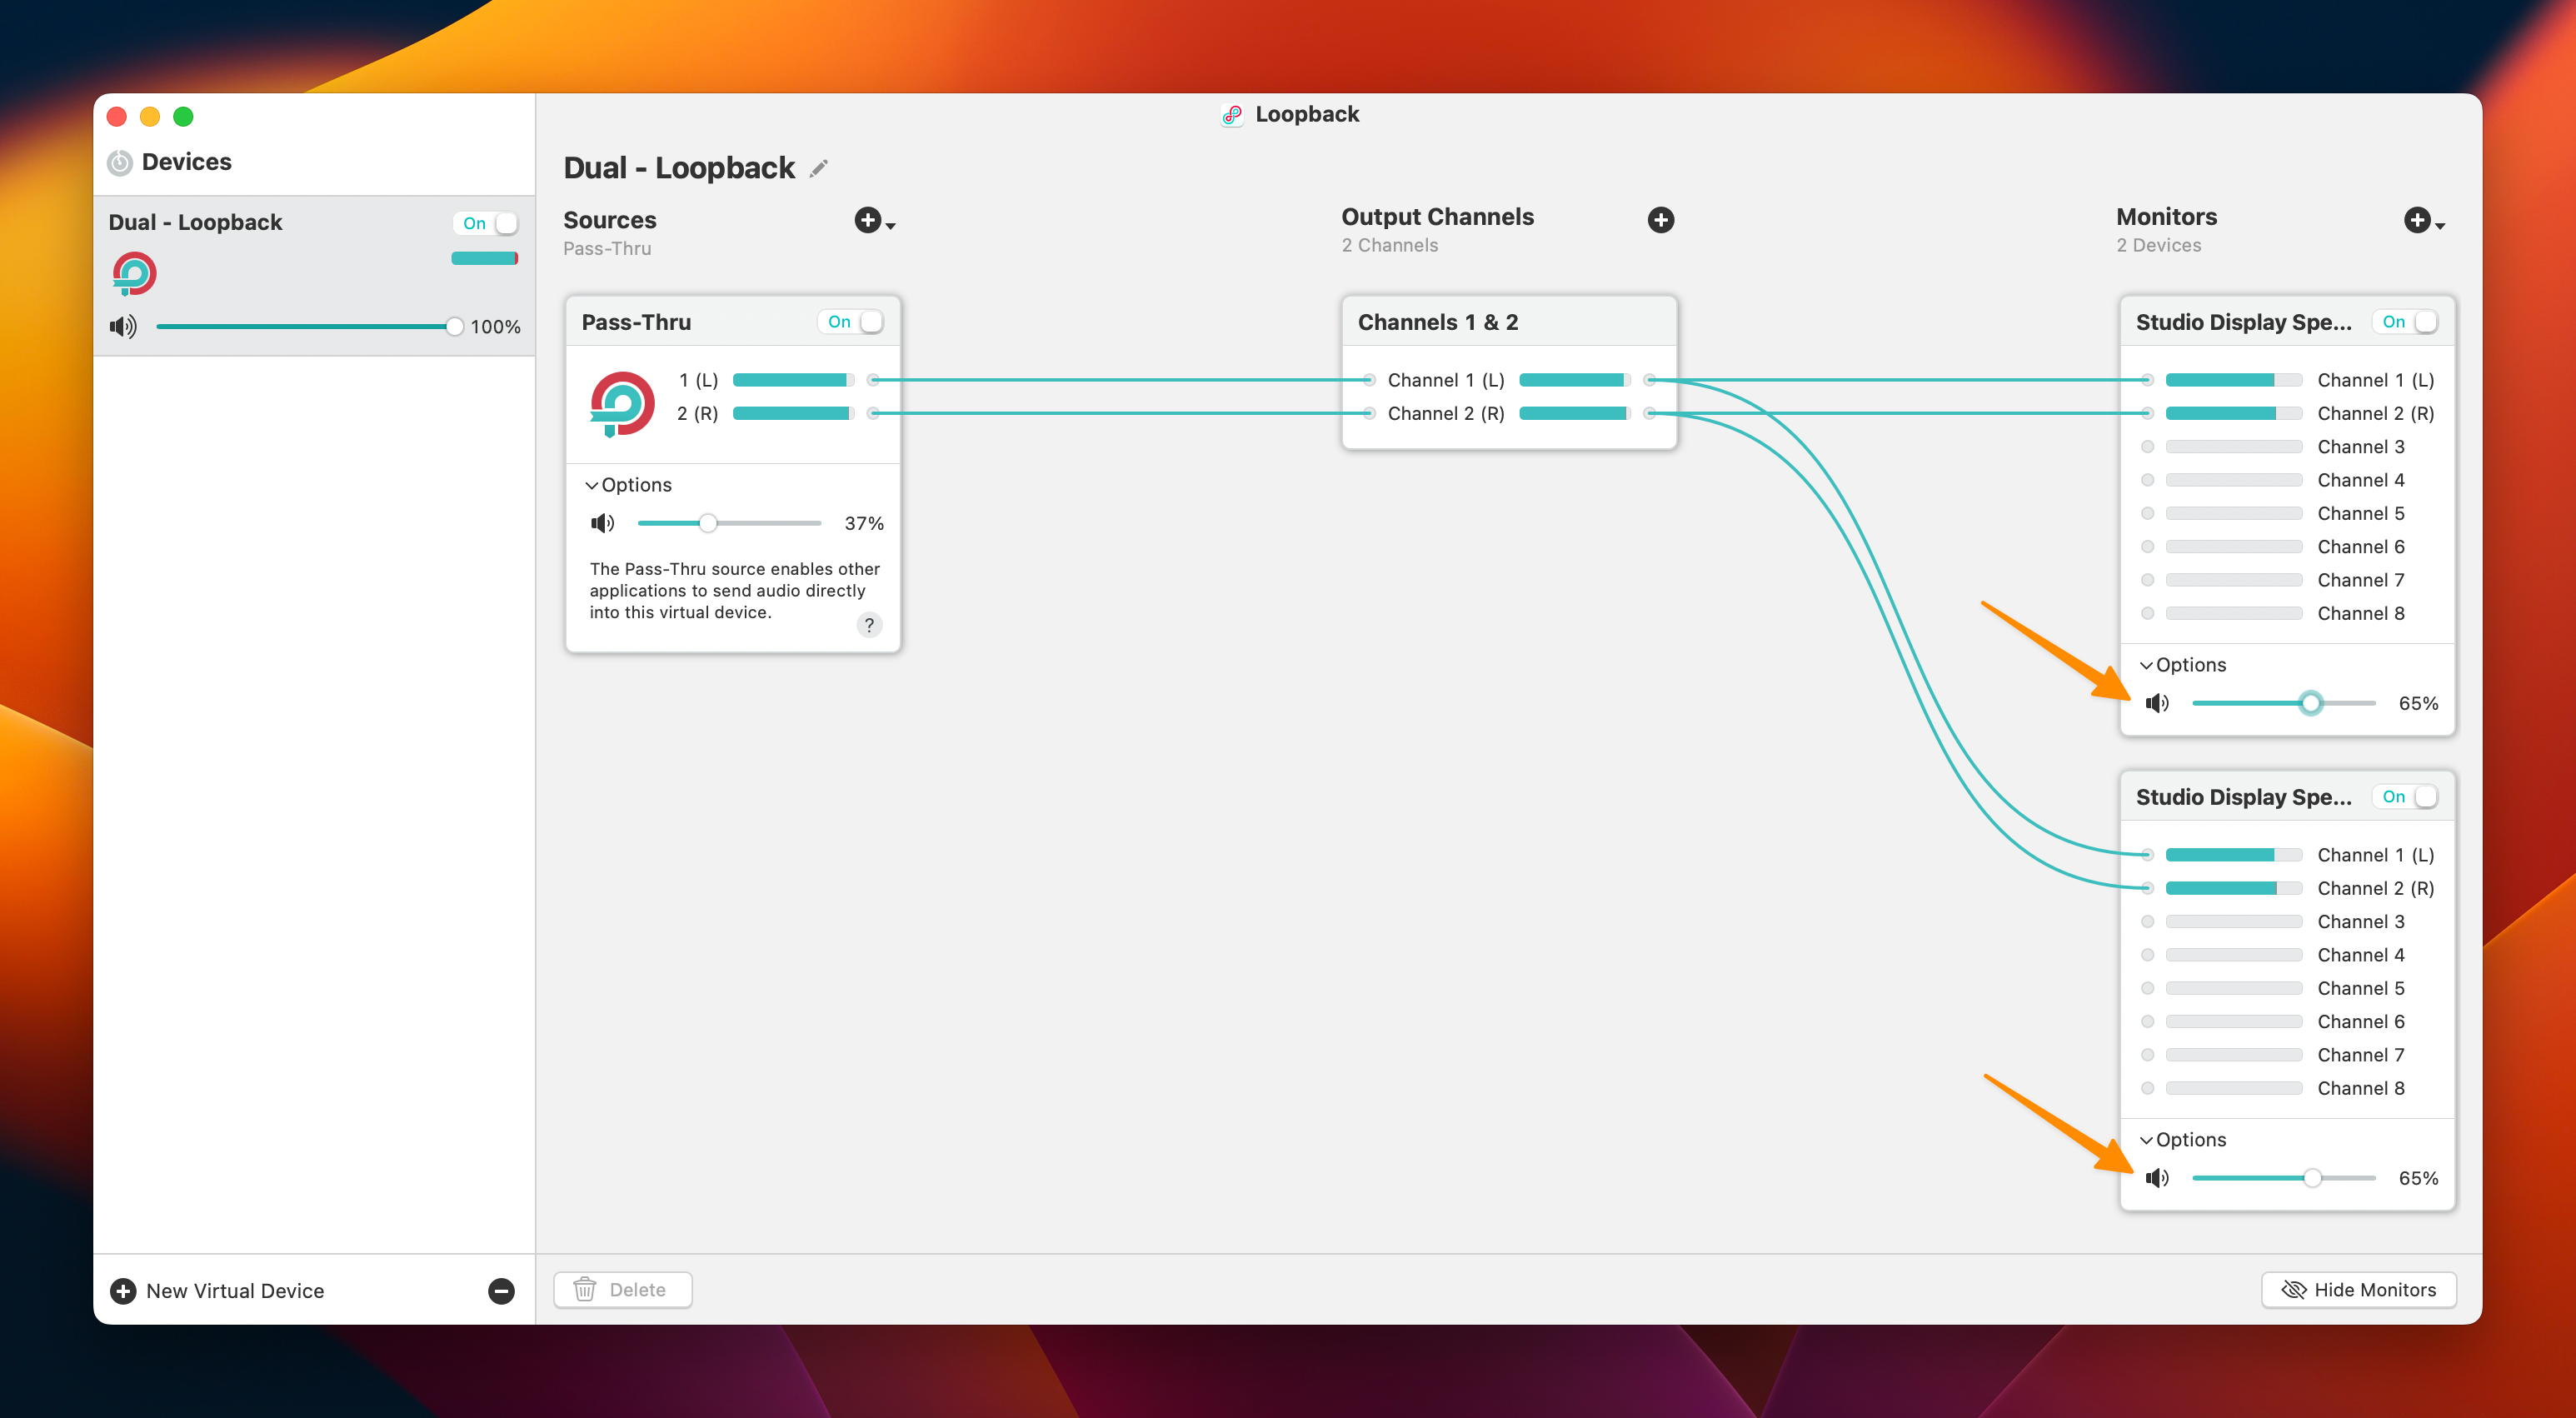
One side effect of this is that a pair of Studio Displays is way louder than one Studio Display. Thankfully, Loopback makes it easy bump down the maximum volume on a per-device basis. Knocking them back to 65% each is working well for me.
This sort of thing is what makes being a macOS user so much fun.